
Integrating edible perennials into a professional residential landscape requires a sophisticated balance between aesthetic value and utilitarian performance. While many homeowners view herb gardens as secondary features relegated to a hidden corner, the inclusion of Stevia rebaudiana offers a unique opportunity to blend silver-green foliage into a formal or cottage-style layout. The primary challenge in landscaping with stevia lies in its sub-tropical origins, which necessitate a deep understanding of microclimates, soil drainage, and site orientation to ensure the plant thrives long enough for a successful harvest. From a consultant’s perspective, the goal is to enhance curb appeal by using stevia as a mid-layer texture while ensuring the plant’s physiological needs are met for maximum glycoside production. Optimal site selection involves analyzing solar patterns to ensure the foliage receives at least six to eight hours of direct sunlight, which is the baseline for high-quality leaf development.
In the context of outdoor functionality, the placement of stevia must account for ease of access. Harvesting and Picking Fresh Stevia should not require trampling through delicate groundcovers or navigating poorly placed irrigation lines. Instead, these plants should be positioned within arm’s reach of a secondary or tertiary walkway, perhaps bordered by a low-profile Stone Edging to define the transition between the turf and the planting bed. Climate considerations are equally paramount. In temperate zones, stevia is treated as an annual or a container-grown perennial that must be moved indoors during winter. This mobility requires the landscape architect to design “flex-spaces” within the garden, such as paved alcoves or reinforced terrace walls, where large ceramic or resin pots can be integrated into the permanent visual structure without appearing temporary or disjointed.
Landscape Design Principles
Effective landscape design for edible crops hinges on the principle of elevation layers. Stevia typically reaches a height of 18 to 30 inches, placing it firmly in the middle tier of a perennial border. To achieve visual balance, it should be anchored by shorter front-facing plants like Thymus vulgaris or Sedum and backed by taller, structural species such as Echinacea or Buxus. This layering creates a cascading effect that draws the eye upward while masking the sometimes woody stems of older stevia plants. Symmetry can be introduced by flanking a garden entrance with identical stevia groupings, though a more naturalistic approach involves cluster planting in odd numbers, such as three or five, to mimic native growth patterns.
Irrigation planning is perhaps the most critical technical component of the design. Stevia possesses a relatively shallow, fibrous root system that is highly sensitive to moisture fluctuations. A professional landscape should utilize a zone-based Drip Irrigation system rather than overhead sprinklers. This precision delivery reduces the risk of fungal pathogens on the leaves and ensures that the root ball remains consistently moist but not saturated. Furthermore, the inclusion of focal points, such as a granite birdbath or a sundial, can pivot the viewer’s attention toward the stevia beds, turning a functional harvest area into a destination within the backyard. Walkways should be constructed from porous materials like Decomposed Granite or spaced Flagstone to allow for natural water infiltration, preventing the soil compaction that often stunts herb growth in high-traffic urban environments.
Plant and Material Selection
| Plant Type | Sun Exposure | Soil Needs | Water Demand | Growth Speed | Maintenance Level |
| :— | :— | :— | :— | :— | : :— |
| Stevia rebaudiana | Full Sun | Sandy Loam, pH 6.7-7.2 | Moderate | Medium | Moderate |
| Rosmarinus officinalis | Full Sun | Well-drained, Alkaline | Low | Fast | Low |
| Tagetes patula | Full Sun | Loamy, Well-drained | Moderate | Fast | Low |
| Lavandula angustifolia| Full Sun | Gritty, Extremely Drained| Low | Medium | Medium |
| Mentha spicata | Partial Shade | Rich, Moist | High | Aggressive | High |
| Cedar Bark Mulch | N/A | High Organic Content | N/A | N/A | Seasonal |
Implementation Strategy
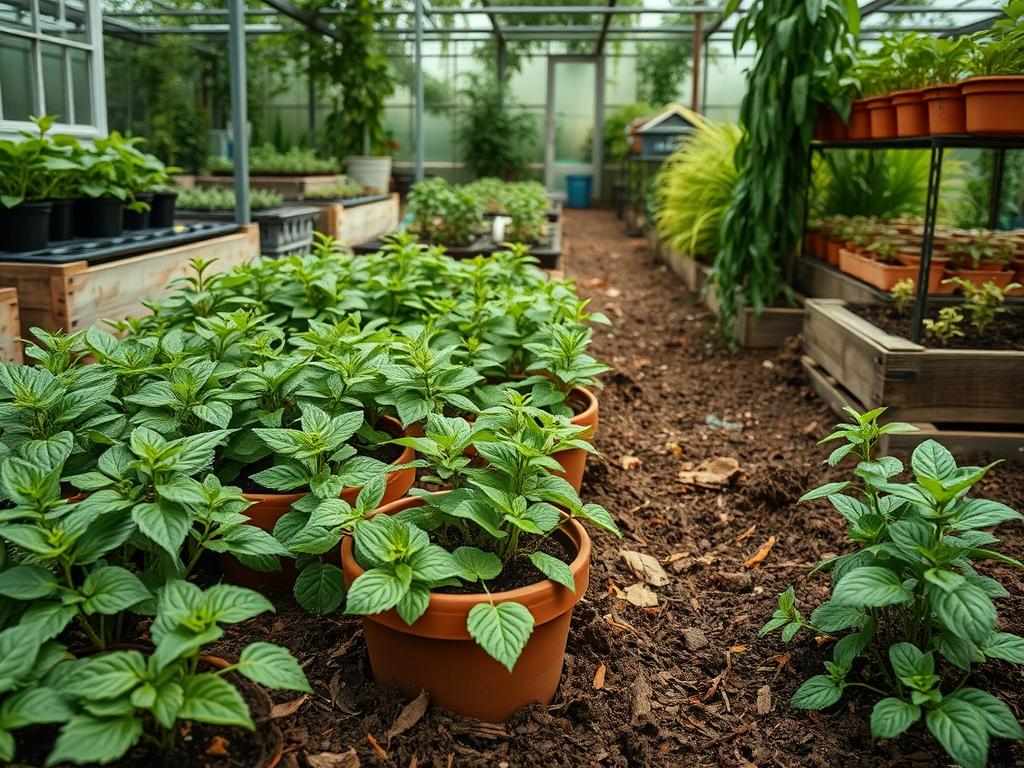
The successful implementation of a garden designed for Picking Fresh Stevia begins with professional-grade grading and drainage preparation. Before any plant enters the ground, the site must be surveyed to ensure a 2 percent slope away from the home’s foundation and any permanent hardscaping. This prevents water from pooling around the stevia roots, which is the primary cause of plant failure. Once grading is complete, the soil should be amended with high-quality Compost and Coarse Sand to create a rich, friable texture that mimics the plant’s native Paraguayan soil. If the local soil is heavy clay, the landscape architect should specify the construction of Raised Beds or Mounds at least 12 inches high to provide the necessary vertical drainage.
Edging should be installed next to provide a crisp, clean line between the planting beds and the lawn. Steel Edging or Belgium Block provides a durable barrier that prevents invasive turf grasses from encroaching on the stevia. Once the hardscape and soil are ready, spacing becomes the focus. Stevia plants should be spaced 12 to 18 inches apart to allow for adequate airflow; this is a non-negotiable requirement for preventing powdery mildew in humid climates. After planting, a 3-inch layer of organic mulch, such as shredded cedar or pine bark, should be applied across the bed. It is vital to keep the mulch a few inches away from the base of the stems to prevent crown rot. This layer serves three purposes: it suppresses weed competition, retains soil moisture, and adds a professional, finished aesthetic to the landscape.
Common Landscaping Failures
One of the most frequent errors in herb-focused landscaping is the “bathtub effect,” where a hole is dug into heavy clay soil and filled with potting mix. Without a proper drainage exit, this hole acts as a reservoir, eventually drowning the Stevia roots during heavy rain events. Another common failure is root overcrowding. Because stevia is a vigorous grower during the peak of summer, many novices plant them too close to aggressive spreaders like Mint or Lemon Balm. The result is a resource war where the stevia is often outcompeted for nitrogen and potassium, leading to a lackluster harvest with low sweetness.
Improper spacing and lack of airflow are also responsible for significant plant loss. In a tightly packed garden, humidity levels rise, creating a breeding ground for pests like Aphids and Whiteflies. Landscape consultants must ensure that the “wind corridor” of the property is not completely blocked by dense evergreen hedges, allowing a gentle breeze to move through the stevia foliage. Finally, irrigation inefficiencies, such as using an automated system set to the same frequency as the lawn, will likely lead to overwatering. Lawns and stevia have vastly different hydrological requirements; therefore, they must be on separate valves within the Irrigation Controller to ensure each receives the precise volume of water needed for optimal health.
Seasonal Maintenance
The cycle of maintenance for an edible landscape is dictated by the seasons. In the spring, the focus is on soil rejuvenation and the application of a Slow-release Organic Fertilizer with a balanced N-P-K ratio. As the weather warms, pruning becomes essential. For stevia, pinching back the growing tips every few weeks encourages a bushier habit and prevents the plant from becoming “leggy,” which can detract from the garden’s visual density. During the summer, the primary task is monitoring moisture levels and checking for signs of nutrient deficiency, such as yellowing leaves, which may indicate a need for more Nitrogen.
Autumn is the pinnacle of the landscape cycle for this specific plant. The process of Picking Fresh Stevia should occur just as the night temperatures begin to drop but before the first frost hits. This is when the concentration of steviosides is at its peak. The entire plant can be cut back, leaving only about 4 inches of stem. These harvested branches are then dried in a cool, dark place with plenty of airflow to preserve the sweetness. In colder zones, this is also the time to transplant a few select specimens into containers to be moved into a greenhouse or sunroom. Winter maintenance involves clear-cutting any dead annual material and applying a thicker layer of Straw Mulch over the dormant roots of any perennials to protect against the freeze-thaw cycle of the soil.
Professional Landscaping FAQ
When is the absolute best time for Picking Fresh Stevia?
Harvesting should occur in late summer or early autumn, specifically just before the plant begins to flower. The sugar levels in the leaves are highest during this period. Once flowers appear, the leaves can take on a bitter, less desirable aftertaste.
Does stevia require a specific type of irrigation?
Yes, a Drip Irrigation system is highly recommended. Delivering water directly to the soil surface prevents the leaves from staying wet, which reduces the incidence of fungal diseases. It also ensures the shallow root system stays hydrated without becoming waterlogged.
Can I grow stevia in a shaded part of the landscape?
Stevia will struggle in the shade. It requires at least six to eight hours of full sun to produce the energy needed for high glycoside content. In shaded areas, the plant becomes spindly, the leaves lose their potency, and growth slows significantly.
What is the ideal soil pH for a stevia garden?
Stevia prefers a slightly acidic to neutral soil, ideally between 6.7 and 7.2. If your soil is too acidic, you may need to add Dolomitic Lime. If it is too alkaline, Elemental Sulfur can help lower the pH level.
How do I prevent root rot in rainy climates?
The most effective way is to improve elevation. By planting stevia in Raised Beds or on mounded soil, you allow gravity to pull excess water away from the root zone. Ensure your soil mix contains enough sand or perlite to facilitate rapid drainage.