
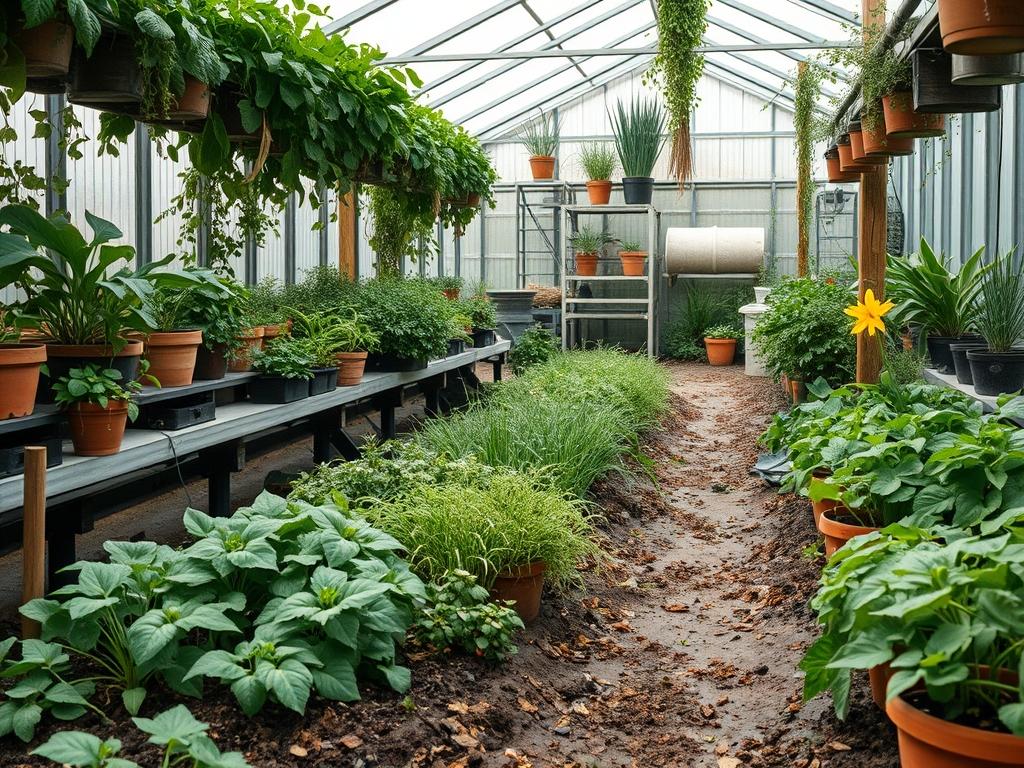
Most homeowners approach a culinary garden as a secondary thought, often tucking plants into mismatched plastic pots or forgotten corners of the yard. However, a professional landscape architect views the herb garden as a cornerstone of functional outdoor living. Integrating these plants into a cohesive site plan requires balancing aesthetics with the logistical requirements of a successful harvest. If the goal is to master the drying of culinary herbs, the process begins months before the first leaf is plucked. It starts with a comprehensive site survey. You must consider the orientation of your retaining walls, the drainage capacity of the topsoil, and the unique microclimates created by your home’s architecture. An herb garden that looks beautiful but fails to produce high essential oil content is a missed opportunity for the culinary enthusiast. Success depends on strategic placement to ensure the peak potency required for long term preservation.
Properly drying culinary herbs is an exercise in moisture management and airflow control. These variables are dictated by the landscape design. When herbs are grown in poor conditions, such as areas with standing water or excessive shade, the plant tissues become succulent and lack the concentrated oils needed for flavor. By applying high end landscaping principles, we create an environment where the plants thrive in a state of controlled stress, which actually maximizes their aromatic profile. This article details how to engineer a landscape that supports high quality herb production and provides the ideal conditions for the subsequent drying process.
Landscape Design Principles
A successful herb landscape operates with the same rigor as any formal garden, prioritizing symmetry, visual balance, and focal points. For a culinary garden, the use of elevation layers is critical. We often utilize raised stone planters or terraced beds to provide the necessary vertical interest while simultaneously improving soil aeration. By raising the planting surface by 18 inches to 24 inches, we facilitate easier harvesting and ensure that the delicate roots of Mediterranean species are never submerged in stagnant groundwater. This elevation also allows for better air circulation around the base of the plant, which is the first step in preventing the mold and mildew issues that plague dried herb storage.
Focal points are another essential element. A large, well pruned Rosemary shrub or a centralized stone sundial can ground the space, while smaller, spreading herbs like Thyme create a lush carpet over flagstone walkways. These walkways serve a dual purpose. They provide clean access to the plants during the early morning harvest, when essential oil levels are at their peak, and they act as a heat sink. The thermal mass of the stones regulates the temperature of the soil, preventing the swing between daytime heat and nighttime frost. This stability results in a more consistent growth cycle and a higher quality leaf structure for the drying rack.
Plant and Material Selection
The following table outlines the specific requirements for various herbs intended for drying. Selecting the right species for your specific USDA Hardiness Zone is the foundation of a low maintenance, high yield landscape.
| Plant Type | Sun Exposure | Soil Needs | Water Demand | Growth Speed | Maintenance Level |
| :— | :— | :— | :— | :— | :— |
| Rosemary | Full Sun | Sandy, Well Drained | Low | Moderate | Low |
| Thyme | Full Sun | Gritty, Alkaline | Low | Fast | Minimal |
| Sage | Full Sun | Loamy, Well Drained | Moderate | Fast | Moderate |
| Oregano | Full Sun | Average, Rocky | Low | Very Fast | High |
| Lavender | Full Sun | Precise Drainage | Low | Moderate | High |
| Peppermint | Partial Shade | Rich, Organic | High | Aggressive | High |
| Sweet Basil | Full Sun | Nutrient Dense | High | Rapid | High |
| Bay Laurel| Full Sun/Part Shade | Loam | Moderate | Slow | Low |
Implementation Strategy
Implementing a professional herb landscape requires a systematic approach to site preparation. First, we address the grading. The land must be sloped at a minimum of 2 percent away from the home and any hardscaping to prevent water pooling. Once the grade is established, we define the beds using heavy duty steel edging or natural stone borders. This creates a clean line between the turf and the garden, preventing invasive grass species from encroaching on the herbs.
For the soil, a custom mix is often preferred over standard garden soil. We recommend a blend of 60 percent sandy loam, 20 percent organic compost, and 20 percent perlite or fine gravel. This mixture mimics the rocky, lean environments where many culinary herbs originate. After planting, we apply a 3 inch layer of cedar mulch or decomposed granite. Mulching is vital for moisture retention in the lower soil layers, but it must be kept several inches away from the stems of the plants to avoid rot.
Irrigation planning must be precise. We typically install a drip irrigation system with pressure compensating emitters. This delivery method ensures that water reaches the root zone directly. Overhead watering is discouraged in a professional herb garden because wet foliage increases the risk of fungal infections, which can ruin a harvest intended for drying. Furthermore, a consistent irrigation schedule prevents the plants from bolting too early in the season, extending the window for high quality leaf production.
Common Landscaping Failures
The most frequent mistake in herb landscaping is root overcrowding. Homeowners often plant herbs too close together to achieve an instant, full look. However, as the plants mature, the lack of airflow between them creates a humid microclimate. This humidity is the enemy of drying. When leaves are harvested from crowded plants, they often carry spores that will lead to rot during the dehydration process. Proper spacing, usually 12 inches to 24 inches depending on the species, is mandatory.
Another common failure involves drainage mistakes. Even with the best soil, if the garden is located in a low spot of the yard, the roots will eventually suffer from root rot. This condition weakens the plant’s immune system, leading to a harvest that lacks the vibrant color and pungent aroma desired in dried herbs. Additionally, soil compaction from heavy foot traffic can suffocate the root system. To prevent this, we always design dedicated gravel paths or stepping stones to ensure that the soil within the beds remains loose and aerated.
Seasonal Maintenance
Seasonal management is what separates a decorative garden from a productive culinary landscape. In the Spring, the focus is on soil rejuvenation and structural pruning. We apply a specialized organic fertilizer with a low nitrogen ratio to encourage leaf production without sacrificing essential oil concentration. As the weather warms into Summer, the priority shifts to harvest management. To produce the best dried herbs, you should harvest before the plant begins to flower. This is the period when the plant’s energy is entirely focused on the foliage.
During Autumn, it is time to prepare the landscape for dormancy. We cut back perennial herbs like Sage and Oregano by approximately one third to encourage a healthy shape for the next year. This is also the best time to apply a fresh layer of mulch to protect the root crowns from the coming frost. In Winter, maintenance is minimal, though we ensure that any hardscape elements or irrigation lines are winterized. For those in colder climates, sensitive herbs like Bay Laurel or large Rosemary specimens may need to be wrapped in burlap or moved to a sheltered area to prevent desiccation from winter winds.
Professional Landscaping FAQ
What is the best time of day to harvest herbs for drying?
The ideal window is the early morning, specifically after the dew has evaporated but before the sun reaches its peak intensity. This timing ensures the highest concentration of essential oils, leading to a more flavorful and aromatic dried product.
How does soil quality affect the fragrance of dried herbs?
Herbs grown in overly rich soil tend to grow quickly but possess fewer aromatic oils. A lean, well drained soil forces the plant to concentrate its compounds, resulting in a much more potent flavor when the leaves are eventually dried and stored.
Can I use wood chips as mulch in a culinary herb bed?
While wood chips are acceptable, shredded cedar or decomposed granite are superior choices. Cedar naturally repels certain pests, while granite provides excellent drainage and architectural texture. Always ensure the mulch does not directly touch the plant stems to prevent decay.
Why are my dried herbs losing their color so fast?
This is often the result of improper harvest timing or poor landscape placement. Herbs grown in too much shade lack the structural integrity to hold color. Additionally, drying them in direct sunlight after harvest will bleach the chlorophyll and dissipate the oils.
How often should I replace the plants in my herb garden?
Perennial herbs like Lavender or Sage generally remain productive for five to seven years. Once the stems become overly woody and leaf production slows significantly, it is best to renovate the bed with new specimens to maintain high culinary standards.