
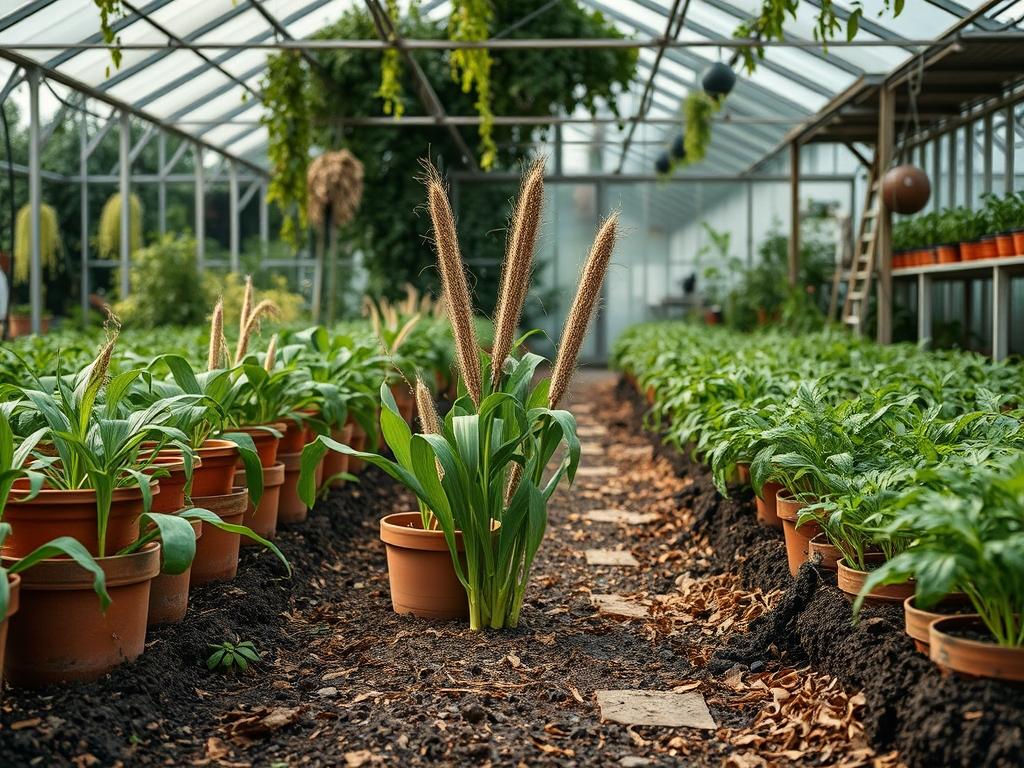
Integrating a production crop like Sorghum bicolor, commonly known as broomcorn, into a residential or commercial landscape requires a shift in traditional aesthetic thinking. Most property owners view their gardens as static visual assets, yet the inclusion of functional, harvestable fibers provides a dynamic layer of interest that changes with the transit of the seasons. From a professional landscaping perspective, broomcorn offers remarkable structural height, often reaching between 6 feet and 15 feet depending on the cultivar. This makes it an ideal candidate for temporary privacy screening or as a backdrop for lower, mounded perennials. When planning for the harvesting of garden broomcorn, one must consider not just the end product of artisanal brooms, but how the plant functions within the broader ecological and architectural footprint of the outdoor space. The crop is remarkably drought tolerant once established, making it a sustainable choice for zones with fluctuating water access. Successful integration begins with a clear understanding of the plant’s life cycle, ensuring that the transition from a lush green screen to a harvested brown field remains visually acceptable and functionally efficient.
LANDSCAPE DESIGN PRINCIPLES
Professional landscape design relies on the intentional use of verticality and texture to create a sense of enclosure and purpose. Broomcorn serves as a powerful vertical focal point, often utilized in the rear of a layered planting bed to provide a sense of scale. Because the stalks grow tall and straight, they provide a rhythmic symmetry when planted in rows or tight clusters. Designers must account for the visual density of the seed heads, which can range from pale green to deep copper or obsidian black. These colors should harmonize with existing hardscape elements, such as flagstone paths or cedar fencing.
Elevation layers are critical when incorporating broomcorn. Since the lower portion of the stalk can become “leggy” or sparse as the plant matures, it is wise to front these rows with mid-sized grasses or flowering shrubs to maintain a lush appearance at the eye level. Irrigation planning must be precise; while broomcorn is hardy, consistent moisture during the initial growth stages ensures the fibers, known as the brush, develop the flexibility required for high quality broom making. Furthermore, walkways should be designed with at least a 3 foot clearance from broomcorn stands to prevent the heavy seed heads from leaning into pedestrian paths after summer rain.
PLANT AND MATERIAL SELECTION
Choosing the right variety of broomcorn is the foundation of a successful harvest. For traditional broom making, the length and pliability of the fiber are the primary metrics of quality. Standard varieties provide long fibers suitable for full sized floor brooms, while dwarf varieties are more manageable for smaller whisk brooms and decorative wall hangings. The materials used in the surrounding landscape, such as shredded hardwood mulch or organic compost, should support the high nitrogen needs of this heavy-feeding grass.
| Plant Type | Sun Exposure | Soil Needs | Water Demand | Growth Speed | Maintenance Level |
| :— | :— | :— | :— | :— | :— |
| Black Amber Broomcorn | Full Sun | Well-drained Loam | Moderate | Fast | Medium |
| Texas Black Seeded | Full Sun | Rich Alluvial | Low to Moderate | Very Fast | High |
| Mixed Colors Sorghum | Full Sun | Adaptable/Clay | Moderate | Fast | Medium |
| Red Wing Broomcorn | Full Sun | Sandy Loam | Moderate | Fast | Medium |
| Little Broomcorn (Dwarf) | Full Sun | Standard Garden | Moderate | Moderate | Low |
IMPLEMENTATION STRATEGY
The transition from a design on paper to a functioning harvest garden involves careful site preparation. Grading is the first step; the area must be leveled or gently sloped to ensure that water does not pool at the base of the stalks, which can lead to root rot. Once the grade is established, applying a 3 inch layer of organic mulch will help regulate soil temperature and suppress weeds that compete for nutrients.
For the actual planting, space the seeds approximately 4 inches apart in rows, later thinning them to 8 inches or 12 inches to allow for adequate airflow. This spacing is vital for the harvesting garden broomcorn process, as overcrowded plants produce thin, weak brushes that are useless for broom construction. As the plants reach their peak height, they may require support. Professional installers often use T-posts and heavy duty garden twine to create a simple trellis system that prevents the stalks from toppling during high winds.
The moment of harvest is the most critical phase of the implementation strategy. To obtain the best fibers, you must monitor the seed heads closely. The ideal time to cut is during the milk stage, when the seeds are formed but still soft and full of a pale liquid. If you wait until the seeds are hard and fully ripe, the brush becomes brittle and loses its architectural “spring.” Use sharp bypass pruners or a serrated harvest knife to cut the stalks. For a standard kitchen broom, you will need a handle length of at least 12 inches to 18 inches attached to the brush. Immediately after cutting, the seeds must be removed using a metal comb or by pulling the brush through a narrow gap to “deseed” the stalks.
COMMON LANDSCAPING FAILURES
One of the most frequent mistakes in growing broomcorn is improper drainage. While the plant is drought tolerant, it cannot survive in “wet feet” conditions where water stagnates. If the site has heavy clay soil, the installation of a French drain or the creation of a raised garden bed is necessary to ensure success. Another common failure is root overcrowding. Many enthusiasts plant too densely, hoping for a thicker screen, but this results in stunted growth and a harvest of “crooked” brushes that are difficult to bind into a functional tool.
Soil compaction is another silent killer of broomcorn vigor. Heavy foot traffic near the root zones compresses the earth, preventing oxygen from reaching the nutrient-absorbing fine roots. To avoid this, clearly defined hardscape paths using pavers or crushed gravel should be installed to direct traffic away from the planting beds. Finally, irrigation inefficiencies, such as overhead sprinkling, can lead to fungal issues within the dense seed heads. A drip irrigation system is the professional standard, delivering water directly to the base of the plant where it is needed most.
SEASONAL MAINTENANCE
Spring maintenance begins with soil testing and the incorporation of a balanced 10-10-10 fertilizer. Once the danger of frost has passed, sowing can begin. It is essential to keep the area weed-free during the first four weeks of growth, as young sorghum is a poor competitor.
Summer focus shifts to hydration and structural support. As the stalks climb toward 10 feet, check the tension on your support wires or twine. This is also the time to watch for the “boot” stage, where the brush begins to emerge from the upper leaf sheath. If you notice aphids or other pests, an application of neem oil or insecticidal soap is recommended to keep the fibers clean.
Autumn is the primary season for harvesting garden broomcorn. Once the harvest is complete, the remaining stalks can be tilled back into the soil to improve organic matter, or pulled and composted. If you leave the stalks standing through winter, they provide excellent cover for birds, though they will lose their structural integrity as they dry and weather.
Winter is the time for tool maintenance and planning. Clean your pruning shears with rubbing alcohol and sharpen the blades to ensure clean cuts for the following year. This is also the period to cure the harvested broomcorn. Hang the bundles upside down in a dark, well-ventilated space like a barn or a dry garage. This “hanging cure” ensures the brushes dry perfectly straight, which is paramount for DIY broom assembly.
PROFESSIONAL LANDSCAPING FAQ
What is the best soil pH for broomcorn?
A neutral to slightly acidic pH between 6.0 and 7.0 is ideal. Use sulfur to lower the pH or lime to raise it, ensuring optimal nutrient uptake for the developing fibers during the peak summer growing months.
How do I prevent broomcorn from falling over?
Ensure deep root penetration by watering deeply and infrequently. In wind-prone areas, use wooden stakes and soft ties to support the stalks once they exceed 5 feet in height to prevent lodging or snapping during storms.
Can I grow broomcorn in large containers?
Yes, though you must use a container of at least 15 gallons to accommodate the root mass. Ensure the pot is heavy, such as terracotta or stone, to prevent the tall stalks from acting as a sail and tipping the pot.
When exactly should I harvest for the best color?
To preserve the vibrant greens or deep reds of the brush, harvest just as the seeds begin to change color but before they turn brown and dry. Immediate drying in a dark location prevents the sun from bleaching the natural pigments.
How long does the drying process take?
Under ideal conditions with low humidity and good airflow, broomcorn typically takes two to three weeks to cure fully. The stalks should feel stiff and the seeds should be easily removed with a stiff brush without tearing the fibers.