
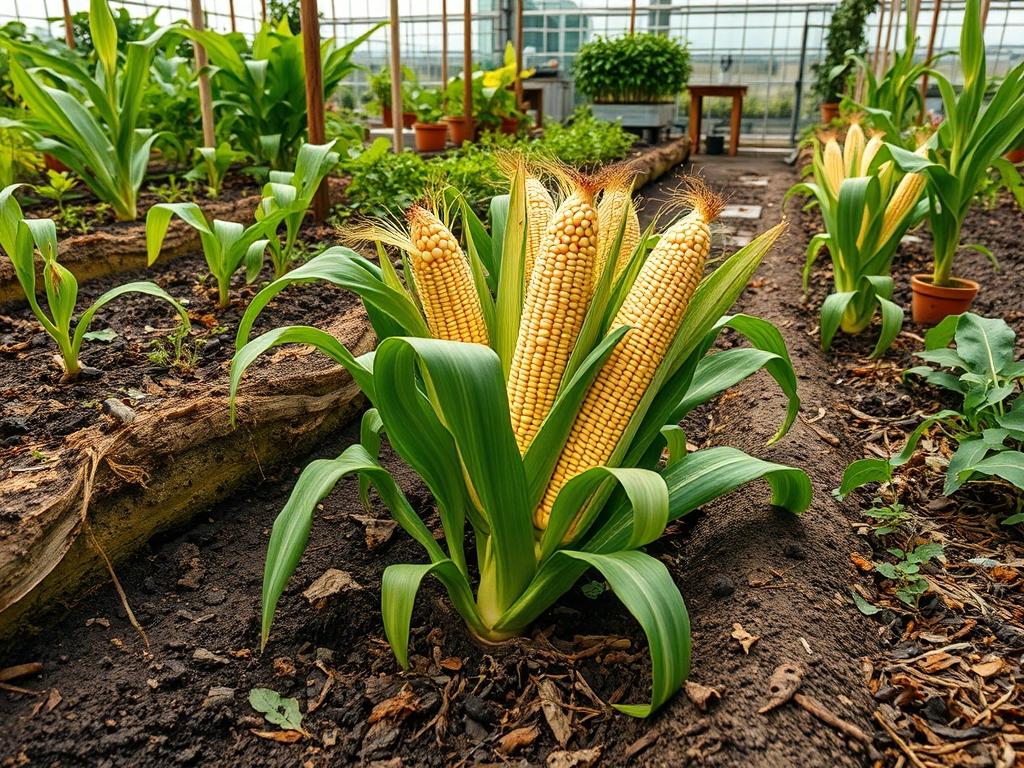
Integrating flint corn, known botanically as Zea mays indurata, into a residential landscape provides a unique opportunity to blend agricultural heritage with modern outdoor design. While traditional ornamental plants offer consistent color, flint corn introduces structural verticality and architectural interest that evolves throughout the growing season. The primary challenge for the landscape architect is managing the transition from the mid summer height of the stalks to the late season harvest when the ears are removed for decorative displays. When planned correctly, these stalks serve as temporary privacy screens or focal points within a mixed border; however, their success depends heavily on site selection, wind protection, and precise timing during the curing process. Enhancing curb appeal with flint corn requires a strategy that treats the plant not just as a crop, but as a textural element that complements hardscaping features such as retaining walls and stone walkways.
Landscape Design Principles
Successful integration of flint corn starts with the principle of elevation layers. In a professional landscape plan, flint corn typically occupies the rear layer of a planting bed because of its potential height, which often reaches 6 to 8 feet. This creates a lush, green backdrop for lower profile perennials such as sedum or coneflowers. To maintain visual balance, designers should group corn in blocks rather than thin, single rows. This clustering technique is not merely aesthetic; it is a functional requirement for wind pollination, ensuring that the decorative ears develop full, vibrant rows of kernels.
Symmetry can be achieved by flanking a formal entryway or a paver path with balanced stands of corn, though this requires careful attention to irrigation planning. Because corn is a heavy feeder that requires consistent moisture, the site must be graded to prevent water from pooling at the base of the stalks, which could lead to root rot or “lodging,” where the plant tips over under its own weight. Incorporating a slight elevation in the planting bed helps facilitate drainage while making the stalks appear even more commanding. Designers should also consider the sightlines from within the home. Positioning the corn where its golden autumn husks catch the late afternoon sun can create a stunning focal point that bridges the gap between the cultivated garden and the natural horizon.
Plant and Material Selection
Selecting the right cultivars and supporting materials is essential for a high quality harvest and a polished landscape appearance. The following table outlines the requirements for flint corn and its common companion plants in a decorative landscape.
| Plant Type | Sun Exposure | Soil Needs | Water Demand | Growth Speed | Maintenance Level |
| :— | :— | :— | :— | :— | :— |
| Flint Corn | Full Sun | Rich, Loamy | High | Fast | Moderate |
| Marigolds | Full Sun | Well-Drained | Medium | Moderate | Low |
| Sweet Potato Vine | Full Sun/Part Shade | Moist, Rich | High | Very Fast | Low |
| Zinnia | Full Sun | Well-Drained | Medium | Fast | Moderate |
| Switchgrass | Full Sun | Adaptable | Low | Moderate | Very Low |
For the corn itself, professional designers often recommend varieties like Glass Gem for its translucent, jewel toned kernels or Dakota Ivory for a more monochromatic, modern aesthetic. To support these plants, use a high quality organic mulch to regulate soil temperature and retain moisture. Avoid lightweight straws that might blow onto lawns; instead, opt for shredded hardwood mulch applied to a 3 inch depth.
Implementation Strategy
The process begins with site preparation and grading. Use a level to ensure the planting area has a 1 to 2 percent slope away from any permanent structures to manage runoff. Once the grade is established, install a clean edge using steel edging or poured concrete curbs to prevent the corn plants from encroaching on manicured lawn areas.
During the planting phase, focus on nutrient density. Flint corn requires significant amounts of nitrogen to reach its full height and produce large, decorative ears. Incorporate a slow release fertilizer into the soil at a rate of 1 pound per 100 square feet before planting. Space the seeds approximately 10 to 12 inches apart in a grid pattern to facilitate pollination. As the stalks grow, monitor the irrigation system to ensure the water reaches the root zone without wetting the foliage excessively, which can encourage fungal pathogens.
When the corn reaches the “silking” stage, the landscape professional should assess the structural integrity of the stalks. In areas prone to high winds, it may be necessary to install subtle bamboo stakes or a monofilament support system to keep the stand upright. This ensures that the stalks remain a clean, vertical element in the landscape rather than becoming a disorganized mass after a summer storm.
Common Landscaping Failures
One of the most frequent mistakes in growing flint corn for decorative use is improper spacing. When stalks are planted too far apart, wind pollination fails, resulting in ears with missing or stunted kernels. Conversely, overcrowding leads to poor air circulation and nutrient competition, causing the stalks to appear yellow and spindly rather than a deep, healthy green.
Drainage issues represent another significant failure point. If the soil becomes compacted or the drainage pipe system is blocked, corn will suffer from anaerobic conditions. This often manifests as stunted growth and a failure to reach the desired height for visual screening. Furthermore, many enthusiasts harvest the corn too early. For decorative use, the kernels must reach a state of physiological maturity where the starch is hard and the moisture content is low. Harvesting while the kernels are still “milky” will result in shriveled, unattractive ears that are prone to mold during storage.
Seasonal Maintenance
Managing a landscape featuring flint corn requires a transition in tactics as the seasons change.
Spring: Focus on soil ammendments and starting the seeds once the soil temperature reaches 60 degrees Fahrenheit. Use a garden spade to integrate composted manure into the top 6 inches of the soil. Apply a pre-emergent weed control that is safe for edible crops to keep the beds tidy.
Summer: This is the peak growth phase. Monitor for pests like the corn earworm and maintain a strict watering schedule. Supplemental nitrogen should be applied when the stalks are about knee high to drive the vertical growth necessary for a dramatic landscape impact.
Autumn: This is the critical harvest period. Wait until the husks are completely tan and dry to the touch. The kernels should be hard enough that they cannot be indented with a fingernail. Cut the ears from the stalks using bypass pruners, leaving a portion of the husk attached for a “shucked” look. Once the ears are harvested, the stalks can be bundled and used as vertical accents around lamp posts or entryway pillars.
Winter: After the decorative display is finished, remove all plant debris to prevent the overwintering of pests. This is an excellent time to evaluate the hardscaping and determines if new retaining walls or raised beds are needed for the following year’s planting.
Professional Landscaping FAQ
When is the best time to harvest flint corn for decor?
Harvest when the outer husks are tan, brittle, and completely dry. The kernels should feel flinty and hard when pressed with a thumbnail. This usually occurs about 100 to 120 days after planting depending on the specific variety.
How do I prevent the corn stalks from falling over?
Planting in a grid pattern provides mutual wind protection. Additionally, ensuring the soil is well drained prevents the root systems from becoming soft and unstable. For tall varieties, use horizontal trellis netting hidden within the foliage for extra support.
Can I grow flint corn in large containers?
Yes, use a container with at least a 15 gallon capacity and ensure it has excellent drainage. Use a heavy potting mix to provide enough weight to prevent the tall stalks from catching the wind and tipping the pot over.
How do I keep the colors vibrant on the harvested ears?
Avoid leaving harvested ears in direct sunlight for extended periods, as UV rays can fade the natural pigments. Store them in a cool, dry place with good airflow. A light coat of clear matte spray can help preserve the luster.
What is the best way to dry the ears after picking?
Peel back the husks to expose the kernels and hang the ears by the husks in a well ventilated area. Using a wire rack also works well. Ensure they are kept away from moisture and rodents during this two week curing process.