
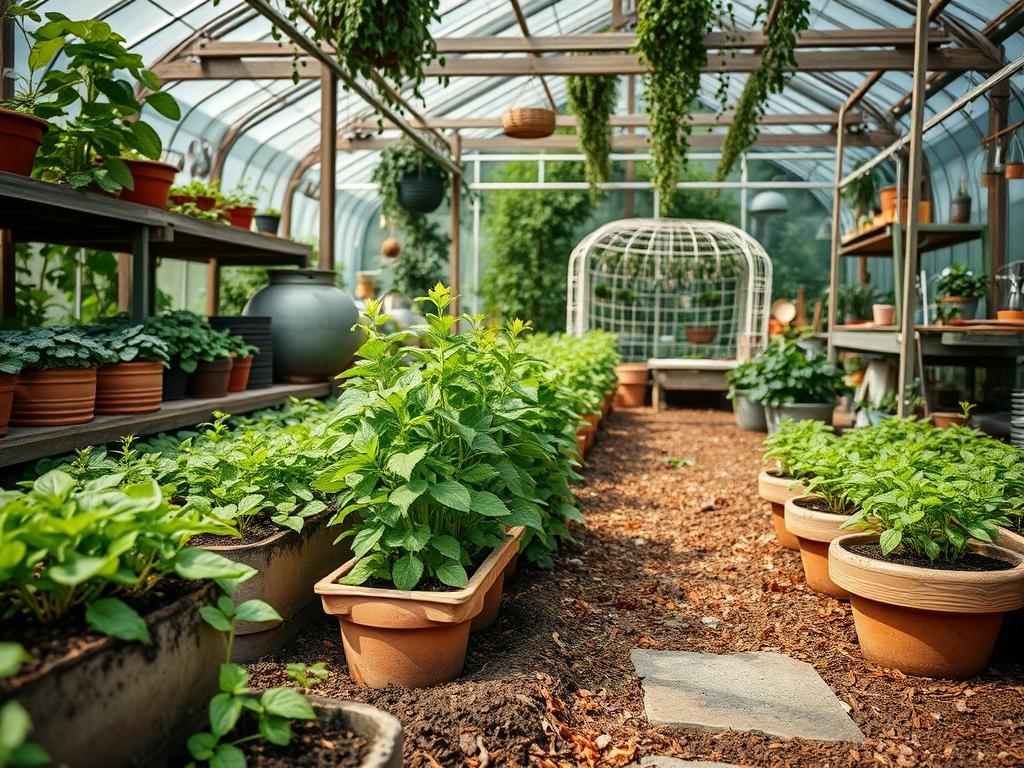
Integrating Stevia rebaudiana into a professional residential landscape requires a subtle balance between aesthetic contribution and functional utility. For many homeowners, the challenge lies in moving beyond the utilitarian look of a traditional vegetable patch to create a cohesive, edible garden that enhances curb appeal. From an architectural perspective, stevia offers a lush, soft green texture that serves as an excellent mid-level filler in perennial borders or tiered garden beds. However, successful harvesting begins long before the first leaf is plucked. It starts with site analysis, soil preparation, and a strategic layout that respects the plant’s sensitivity to drainage and light. In temperate climates, stevia is often treated as a tender perennial or an annual, meaning the design must accommodate seasonal replanting or easy accessibility for container transitions. By prioritizing proper outdoor environment planning, we ensure that the plant thrives, producing the highest concentration of glycosides for natural sweetening.
LANDSCAPE DESIGN PRINCIPLES
Professional landscape design relies on the principle of hydrozoning, which is the practice of grouping plants with similar water and light requirements to maximize irrigation efficiency. For Stevia rebaudiana, this means placing it alongside companions like Rosmarinus officinalis or Lavandula, which also prefer well-draining soil and significant sun exposure. To achieve visual balance, use stevia as a textural counterpoint to broad-leafed plants or rigid evergreens. Its slightly serrated, bright green leaves provide a soft, organic feel that can break up the hard lines of stone walkways or timber retaining walls.
Symmetry in the garden can be maintained by using stevia in repetitive clusters rather than single, isolated stalks. This creates a sense of intentionality and prevents the garden from appearing cluttered. Elevation layers are equally important. Because stevia typically reaches heights of 18 to 30 inches, it should be positioned in the middle ground of a bed, behind low-growing groundcovers like Thymus praecox but in front of taller structural elements like ornamental grasses or trellis systems. This layering ensures that every plant receives adequate airflow, which is critical for preventing the fungal issues that can plague stevia in humid environments. Furthermore, integrating permanent walkways made of flagstone or decomposed granite allows the gardener to access the plants for frequent harvesting without compacting the soil near the root zones.
PLANT AND MATERIAL SELECTION
Choosing the right materials and companion species involves understanding the specific microclimate of your backyard. The following table outlines the requirements for stevia and its ideal landscape partners.
| Plant Type | Sun Exposure | Soil Needs | Water Demand | Growth Speed | Maintenance Level |
| :— | :— | :— | :— | :— | :— |
| Stevia rebaudiana | Full Sun | Sandy Loam | Moderate | Medium | Moderate |
| Lavandula angustifolia | Full Sun | Gritty, Alkaline| Low | Slow | Low |
| Salvia officinalis | Full Sun | Well-Drained | Moderate | Fast | Low |
| Tagetes (Marigold) | Full Sun | Loamy | Moderate | Fast | Low |
| Ocimum basilicum | Full Sun | Rich, Organic | High | Very Fast | Moderate |
IMPLEMENTATION STRATEGY
The implementation of a stevia-focused landscape begins with grading. To prevent stagnant water, the garden bed should be slightly elevated above the surrounding grade. A gentle slope of 2 percent away from any structural foundations will ensure that heavy rainfall does not drown the delicate root systems. When planning the layout, start by marking the perimeters with marking paint or landscaping twine. Ensure that the soil is amended with 2 to 3 inches of organic compost mixed into the top 8 inches of native soil to improve porosity.
If your landscape includes hardscaping, consider using retaining wall blocks to create raised planters. These provide excellent drainage control and bring the plants closer to waist height, making the harvest process much more ergonomic. For the edging, a clean steel edge or cobblestone border helps define the space and prevents turf grass from creeping into the herb beds. Once the plants are in the ground, apply a 2 inch layer of hardwood mulch or pine straw. This serves three purposes: it regulates soil temperature, suppresses weeds that compete for nutrients, and keeps the lower leaves of the stevia plant clean from soil splashback during irrigation. For the irrigation system, a drip irrigation line with emitters spaced every 12 inches is the most efficient choice, as it delivers water directly to the roots without wetting the foliage, thus reducing disease risk.
COMMON LANDSCAPING FAILURES
One of the most frequent mistakes in herb-centric landscaping is improper spacing, which leads to root overcrowding and poor air circulation. When stevia plants are placed too close together, they compete for nitrogen and potassium, resulting in spindly growth and bitter leaves. Professional standards suggest a minimum spacing of 18 inches between each plant. Another common failure is the use of heavy, clay-rich soil without adequate amendments. Stevia roots are prone to rot in compacted soil where macropores are non-existent.
Irrigation inefficiencies often stem from “set and forget” timers that do not account for natural rainfall. Overwatering not only dilutes the sweetness of the leaves but can also lead to systemic failures in the plant’s vascular system. Furthermore, many hobbyists fail to consider the impact of high-nitrogen fertilizers. While nitrogen promotes lush green growth, it often inhibits the production of steviol glycosides. A landscape architect would recommend a balanced, slow-release organic fertilizer or a phosphorus-heavy blend during the peak growing months to ensure the harvest is as sweet as possible. Finally, neglecting the “harvest prune” is a design failure; if the plant is allowed to lankily stretch out of its designated zone, it loses its aesthetic value and becomes a messy focal point.
SEASONAL MAINTENANCE
Effective landscape management follows the rhythm of the seasons to ensure longevity and productivity. In the Spring, focus on soil preparation and transplanting. Once the danger of frost has passed and the soil temperature reaches 60 degrees Fahrenheit, you can move your stevia starts into the garden. This is also the time to check your irrigation lines for leaks and clear any debris from the drainage grates.
Summer is the peak period for both growth and harvesting. To maintain the plant’s shape and encourage bushier growth, pinch back the terminal buds every few weeks. The most critical harvest occurs just before the plant begins to flower, as this is when the leaves contain the maximum concentration of sweetener. Use bypass pruners or sharp garden shears to take cuttings in the early morning, when the moisture content is highest.
As Autumn approaches, the goal shifts to preservation. In colder zones, you should prepare to take cuttings for indoor propagation or move potted specimens into a greenhouse. If you are leaving them in the ground in a frost-free zone, apply a fresh layer of mulch to protect the crown. During the Winter, maintenance is minimal. For those in mild climates, ensure the soil stays slightly moist but never saturated. In colder regions, the empty beds can be top-dressed with leaf mold or a cover crop to replenish the soil for the next cycle of planting.
PROFESSIONAL LANDSCAPING FAQ
When is the best time to harvest stevia leaves?
The optimal time for harvesting is in the late summer or early autumn, specifically before the plant produces flowers. Morning harvests, after the dew has evaporated but before the heat of the day, yield the highest sugar concentrations.
Can stevia be used as a groundcover in a landscape?
Stevia is better suited as a mid-height border plant rather than a groundcover. Its upright, bushy growth habit makes it ideal for adding vertical texture and volume to garden beds rather than spreading horizontally across the soil.
How does soil pH affects the stevia harvest?
Stevia thrives in slightly acidic to neutral soil, ideally between a pH of 6.0 and 7.5. If the soil is too alkaline, the plant may suffer from nutrient deficiencies, which negatively impacts the sweetness and health of the leaves.
Do I need a specific irrigation system for stevia?
A drip irrigation system is highly recommended. It provides consistent moisture while keeping the foliage dry, which is essential for preventing the leaf spot and fungal diseases that often occur with overhead sprayers or manual watering.
What is the best mulch for a stevia garden bed?
Use a high-quality organic mulch such as shredded bark or cocoa hulls. These materials help maintain consistent soil moisture and temperature while slowly adding nutrients back into the earth as they decompose over the growing season.